Friday, January 30, 2015

Compound Words & 2D Geometry

Happy Friday, y'all! Not sure about you but I've been working on report cards all week...but I'm happy to finally sing:

So needless to say, this week's recap is going to be short and sweet! Let's start with compound words:
Most of our literacy centres were focused on practicing identifying and writing compound words, and throughout the week we added to this little anchor chart:
They loved writing words in our pancake. 
I actually used this same idea last year as well...but as they say: if it ain't broke, don't fix it! 
FLASHBACK:
Last year's anchor chart was so much cuter!

We also repeated an another activity for our pocket chart centre that is currently my number 1 most-downloaded freebie on TpT:
If you don't already own it, click HERE to snag a copy!

In math, we continued with 2D geometry by learning about symmetry:
We used these anchor charts to practice making various shapes and figures symmetrical before trying it out on our own. I find symmetry is often quite a difficult concept for some little ones to demonstrate independently but I have to say, my firsties ROCKED it this year!
They were all about our symmetrical snowman:

...And if you're looking for some extra practice worksheets to go along with a basic geometry unit, check out this new product I just added to my little shop:
So far we've used most of the 2D worksheets as centre activities and the kids really enjoyed them...especially the "Shape Search." I've even used 2 as assessment pieces. 
I won't introduce 3D geometry until second term but I can't wait to try those out!

If you want a closer look at this pack, click HERE.

And that about wraps it up! Have a great weekend :)

Friday, January 23, 2015

Snowman Week & 2D Geometry FREEBIES!

Hi everyone! I hope you had a fabulous week, but seriously--T.G.I.F.!!! 
My week can pretty much be summed up as follows:
(Don't.bug.me. while I'm *still* frantically trying to get through DRA assessments!!! ...which I began the first day back, BTW. I swear I said "ask 3 before me!" about a thousand times this week.)
(The second I mention we will be doing an activity in partners they suddenly transform into secret service agents *thinking* that they are subtly communicating messages to their besties across the carpet ...needless to say: I chose partners all week.)
(Seriously. Was there a full moon?!)
(And need I say more?)

Okay! Well now that I've gotten that off my chest haha! Let's get to some of the fun we had this week! Our literacy centre activities were all snowman-themed and our pocket chart centre was a particular hit this week:
If you follow me on Instagram, you may have seen that I posted about this FREEBIE activity. The students simply use the pictures of the snowmen to help unscramble each of the 7 sentences:
I love this simple centre activity because it helps my kiddos work on sentence structure along with some sight words thrown in there (specifically the sight word "this")
You can download the whole activity, along with the above extension worksheets, for FREE in my TpT store...click HERE to check it out.

To keep up with the snowman theme, I also wrote this sad little story to use as our shared reading for the week:
It was the best story I could come up with that crammed as many Dolch Primer sight words into it as I could. All the words written in colour are primer sight words...there are 22 in total, so not too shabby in my books! The kids were thrilled that they were able to read the whole story independently by the end of the week, and I was thrilled that we were practicing our Primer sight words and fluency! Each morning after reading the story, we played "I Spy" and searched for 3 different sight words. 

Psssstt...if you're looking for some more snowman-themed literacy activities, I have another simple freebie available in my store that you might like to snag as well ;)


We also began a new unit in math; 2D & 3D Geometry. Yesterday the kids played an "I Spy" game...in partners...*sigh*....where they used descriptive math words (such as curved, straight, corners, points, etc.) to give clues to their partner about a figure/shape they were spying around the room. The partner had to guess the figure based on the description. They also filled out a simple chart for each turn (showing what the shape was and recording the descriptions that were given). They actually had total a blast doing this!

Today we began identifying more cornet information about common 2D figures by putting our ideas onto an anchor chart:
(we ran out of time and will have to finish triangles on Monday!)

Next we played a fun little SMARTboard memory game just to see where their spatial awareness was at. To play the "game," I first made little blank booklets for each firstie (made simply by cutting paper into quarters).
(their completed booklets are hanging on our math wall so they can look through each others' work)

Next I showed them an image on the SMARTboard for only about 5 seconds. When I hid the image back up (with the "Show/Hide Screen Shade" tool highlighted on the top toolbar of the image below), they had to transfer what they saw onto their booklet page:
We started off really simple (see diagonal line above) and gradually the images got a little more complex. After each image, we stopped and talked about some of the strategies we used to help us replicate each slide. It was really interesting to hear their interpretations:
Most students said they drew an "X" for this one. I also had some say they drew "4 triangles."
For this one, most students shared that they drew a "plus sign" (which I was expecting since we just finished up addition), but some also said they drew a "window" or "four squares." 
This one was interesting because I had a few say they drew an "envelope," some drew the letter "V," and one said they drew "3 triangles."

We only did this activity with 4 images today. Near the end of our geometry unit, we will do it again with some of the more complex images to see how our perceptions and abilities have developed over the course of this little math unit. You can download this SMARTboard file for FREE! It includes all of the above images along with several others and a blank template for you to create any images you'd like:
Click HERE to download the complete SMARTboard file.

Have a wonderful weekend :)

Saturday, January 10, 2015

FREE Addition Math Station Worksheet & Noise Level Management

Hi everyone! The first week back after Christmas break has been nothing short of crazy, so I have to admit that I definitely slacked on taking good pictures. But I will make up for a bland blog post by sharing a fun freebie with y'all!

First of all, our addition & subtraction unit in math is officially in full swing. We wrapped up addition by applying our new knowledge to some problem solving challenges. After practicing some questions together over a few days, we began solving problems in partners and independently:
Here are two examples of the types of higher level thinking problem solving questions we were working on:

Because my firsties are *all about* centres, I used four very simple worksheets from my Print & Go Addition and Subtraction Worksheet pack that they completed as four math centres/work stations. Each group visited two centres over two days. Here's what they were working on:
This first "Roll a Fact!" centre got kids practicing addition with dice. Each student got one die. They rolled it once and recorded the number in the first box, then rolled it again and recorded the number in the second box. After rolling two numbers, they added them together. Super simple!
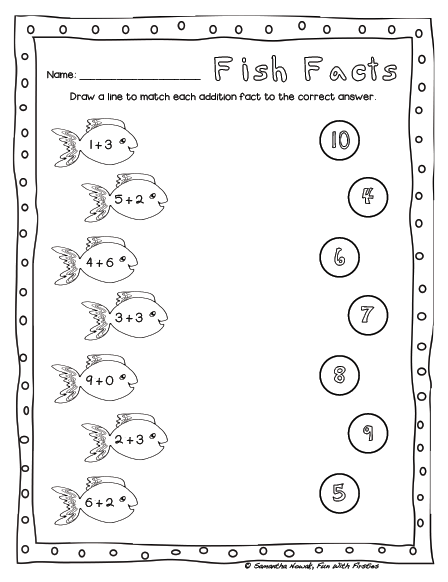
The "Fish Facts" centre was a hit with my little ice-fishing northerners! On the first worksheet, kids draw a line to match each fish's fact with the correct bubble answer. On the second worksheet, they simply solved the addition problem and wrote the answer in each fish's bubble. 

Colour by numbers pages are always a hit with my firsties so I made a simple "Colour by Addition Fact" worksheet for the next centre. This page is part of my Addition & Subtraction pack but I'm offering it as a sample of this pack for FREE! Just click HERE to download it! 

Last but not least, we practiced a little fine motor cutting with this "Delicious Addition!" worksheet. The kids simply cut out the cupcake tops and matched them with the correct bottom to make each addition fact true. 

If you're interested in the above worksheets, here's a closer look at what you'll get from the addition & subtraction worksheet pack:


Finally, last week I wrote a post all about behaviour management. So I thought I'd share another tool that I recently started using (and loving) with my firsties:
I have a noise level visual posted front and centre in my classroom (the image in the centre of the picture above is a cropped photograph of the actual noise level visual in our classroom...located on one of the whiteboards). I created this visual based on the recommendation of our school's behavioural psychologist to benefit a little one in my class diagnosed with Aspergers. But like many of her suggestions, I found this tool incredibly useful for my entire bunch. 

It provides the kids with a helpful visual when it comes to self-regulation and obviously for monitoring noise level within the classroom. Whenever I expect the room to be silent, quiet, or full of interaction, our noise level visual reinforces concrete expectations. It's great because all I have to do is point at our visual if a student requires a reminder...and more often than not, they are so clear on what is expected of them at various points in our day (for example, literacy centre noise level expectation vs. seat work noise level expectation) that they sometimes remind ME to change the location of the arrow! Now that's self-management! 

The above visual actually includes several options as well as assembly instructions depending on which option you decide works best for your class. If you're interested in seeing more, feel free to check it out :)

Have a wonderful weekend!

Friday, January 02, 2015

Behaviour Management & 1-2-3 Magic for Teachers

HAPPY NEW YEAR!

A little while back, I created this resource of printable posters for the "Take 5" time out space in our classroom: 
(You can download the posters HERE)
(2016 UPDATE! There is now an EDITABLE version also available!)
(2016 UPDATE! There is also a FRENCH version available, too!)

When I shared about it on Instagram, I got some questions about how exactly I use these posters and the 1-2-3 Magic behaviour plan in my classroom. So today, I thought I'd share a bit about it with you.

First of all, it's important to note that this is strictly my personal opinion and based on my own experience with using the program. No one has ever approached me or is paying me to write about it. I actually learned about the 1-2-3 Magic program after our school's behavioural psychologist lent me her DVD as a recommendation for a little peanut in my classroom with ADHD and Aspergers. I watched the DVD (and loved it) and decided that it would be great for my entire bunch. 
You can purchase it from Amazon HERE.

I don't know about you, but I've sure tried my share of behaviour management strategies throughout the years, from clip charts to golden tickets. Although I liked some more than others, they all had one thing in common: they were a little too complicated! And honestly, sometimes they weren't THAT complicated but they were complicated enough that I was not being consistent with them...thus they were not as effective as they could have been. 

But this. Is. SIMPLE.

Here is the most basic possible explanation of the 1-2-3 Magic system: 
1. If a child is making a bad choice (anything from shouting out to refusing to work), you "count" them. This means, calmly tell the child (let's call him John), "John, that's 1" and hold up 1 finger.
2. If John continues his bad choice or makes another bad choice you calmly say, "John, that's 2" and hold up 2 fingers.
3. If John continues his bad choice or makes another bad choice you calmly hold up three fingers and say, "John, that's 3. Take 5."
4. John then goes to the designated area to take a 5-minute break.

That's it. 
No raising your voice. No arguing/engaging. And most importantly, no explaining or talking. 

I love it because it's so simple; It doesn't interrupt my lesson and it eliminates a power struggle. Now obviously there's a lot more to this plan (such as "what happens if the child refuses to go to time out?" or "How long do I wait between each count/warning?" etc.) that takes practice and consistency. I can't do much more than recommend that you watch the DVD because it thoroughly covers every aspect and possible situation. And although the DVD itself is dated, the information is perfectly relevant. They do an awesome job of covering all the bases and eventually answering every question that popped up in my head as I watched. I honestly highly recommend it.


So anyways, our time out or "Take 5" area (which in the pictures below is located within the classroom but has since been moved just outside our classroom door to minimize distractions) features the following:
a mirror
a 5-minute timer
- a chair
- a weighted blanket 
(we used to have a wiggle cushion and weighted lizard as pictured but have since changed that to the weighted blanket simply because that is what works best for our kids)
Once again, that's it
No "fluff." No fidget toys, stress balls, stuffed animals, or other items that you might find in another calming area. Those things are all great and useful but the purpose of "take 5" is simply to take 5! Calm down and prepare to return and make better choices. When first introducing our Take 5 location to my firsties I made it clear that the location is not a punishment, but it is also not a fun place to hang out. It's a place to take a break.

So anyways, in addition to 1-2-3 Magic we also use a resource developed by an autism specialist called the Zones of Regulation which is "geared toward helping students gain skills in consciously regulating their actions, which in turn leads to increased control and problem solving abilities." Again, it is a self-regulation resource that I find useful to use with my entire bunch of firsties. You can read more about it by following the link above, but the big reference poster I made below sums it up pretty simply:
It helps students to begin recognizing what "zone" they are in, in order to regulate their own behaviour. If they are in the yellow or red zone, we have practiced strategies that they can use to help bring them back to the green zone:
The above reference poster is from a great website called Conscious Discipline.

Not only can the kids use any of these 4 calming techniques to control their behaviour, but I am constantly using them casually throughout the day. For example, if the kids are all talking and I need to get their attention I might begin modelling "balloon breath" and the kids know to drop what they are doing and follow along. It works quite well because they enjoy doing the exercises. They're also awesome because they are full-body exercises which requires kids to drop everything and demonstrate full-body listening.

You can download FREE posters of the strategies in various sizes by clicking HERE.

I could probably go on forever about what I've mentioned briefly this post but it about sums up the gist of our classroom behaviour plan. And I have to say that it is by far the most convenient and effective behaviour plan I've tried to date.

Stay tuned because I plan on posting a couple more behaviour/classroom management techniques and resources (and FREEBIES!) that I like using with my firsties.

But as always, I love hearing from you. 
What behaviour plans or strategies have you tried and loved?