Showing posts with label special education. Show all posts

Tuesday, June 16, 2015

TpT Seller Challenge: MAKEOVER MADNESS!

Hi everyone! So I'm sure you've already heard about a few fabulous ladies (Sparkling in Second, Third in Hollywood, Peppy Zesty Teacherista, and Teach Create Motivate) and their super motivating TpT Seller Challenge! I'm all for a kick-in-the-pants so I will be participating in their challenge and posting my work each week:
Week 1 is "Makeover Madness" where we were motivated to update one product cover and/or product content of our choice. Well I have recently been working on building consistency throughout my newer product covers and have been meaning to go back and re-do a few of my covers for a loooooong time now. So I updated FOUR product covers/products! 

Here they are! (psst...click any of the pics to get a good close-up of each image!)
This is the cover of one of my best-selling products, "Chalkboards & Banners", a classroom labels and decor pack. I don't actually hate the original but, like I mentioned, it wasn't consistent with the rest of my store. So it got a facelift!!


Oh boy. This one is embarrassing. That horrid image on the left was the PRODUCT COVER for my "All About Me" autobiography template pack. How I sold as many as I did is beyond me, bless all of you who were brave enough to click to learn more!! But again....FACELIFT! aahh. Much better.
P.S. if you own this pack, go download the update! I improved all of the writing lines and added another option on the "My Favourite Things" page.


Next is one of my kiddies' favourite products; my "Dry Erase Binder." It got a little facelift as well and went from drab to fab! Well...maybe not FAB, but it provides a whole lot more information-at-a-glance :)


Last but not least, I gave this *entire* product a little facelift. As another one of my best sellers, my "Telling Time" pack got a much-needed update in the form of new fonts, better layout, and a conversion of one of the activities to a more hands-on cut-and-paste activity...
...and I obviously updated this cover as well :)
If you own my "Telling Time" pack, go download the update!

Now for the best part: 
All of the products above are ON SALE in my store 
until Friday! 

See you next week!!

Friday, January 02, 2015

Behaviour Management & 1-2-3 Magic for Teachers

HAPPY NEW YEAR!

A little while back, I created this resource of printable posters for the "Take 5" time out space in our classroom: 
(You can download the posters HERE)
(2016 UPDATE! There is now an EDITABLE version also available!)
(2016 UPDATE! There is also a FRENCH version available, too!)

When I shared about it on Instagram, I got some questions about how exactly I use these posters and the 1-2-3 Magic behaviour plan in my classroom. So today, I thought I'd share a bit about it with you.

First of all, it's important to note that this is strictly my personal opinion and based on my own experience with using the program. No one has ever approached me or is paying me to write about it. I actually learned about the 1-2-3 Magic program after our school's behavioural psychologist lent me her DVD as a recommendation for a little peanut in my classroom with ADHD and Aspergers. I watched the DVD (and loved it) and decided that it would be great for my entire bunch. 
You can purchase it from Amazon HERE.

I don't know about you, but I've sure tried my share of behaviour management strategies throughout the years, from clip charts to golden tickets. Although I liked some more than others, they all had one thing in common: they were a little too complicated! And honestly, sometimes they weren't THAT complicated but they were complicated enough that I was not being consistent with them...thus they were not as effective as they could have been. 

But this. Is. SIMPLE.

Here is the most basic possible explanation of the 1-2-3 Magic system: 
1. If a child is making a bad choice (anything from shouting out to refusing to work), you "count" them. This means, calmly tell the child (let's call him John), "John, that's 1" and hold up 1 finger.
2. If John continues his bad choice or makes another bad choice you calmly say, "John, that's 2" and hold up 2 fingers.
3. If John continues his bad choice or makes another bad choice you calmly hold up three fingers and say, "John, that's 3. Take 5."
4. John then goes to the designated area to take a 5-minute break.

That's it. 
No raising your voice. No arguing/engaging. And most importantly, no explaining or talking. 

I love it because it's so simple; It doesn't interrupt my lesson and it eliminates a power struggle. Now obviously there's a lot more to this plan (such as "what happens if the child refuses to go to time out?" or "How long do I wait between each count/warning?" etc.) that takes practice and consistency. I can't do much more than recommend that you watch the DVD because it thoroughly covers every aspect and possible situation. And although the DVD itself is dated, the information is perfectly relevant. They do an awesome job of covering all the bases and eventually answering every question that popped up in my head as I watched. I honestly highly recommend it.


So anyways, our time out or "Take 5" area (which in the pictures below is located within the classroom but has since been moved just outside our classroom door to minimize distractions) features the following:
- a mirror
- a 5-minute timer
- a chair
- a weighted blanket 
(we used to have a wiggle cushion and weighted lizard as pictured but have since changed that to the weighted blanket simply because that is what works best for our kids)
Once again, that's it. 
No "fluff." No fidget toys, stress balls, stuffed animals, or other items that you might find in another calming area. Those things are all great and useful but the purpose of "take 5" is simply to take 5! Calm down and prepare to return and make better choices. When first introducing our Take 5 location to my firsties I made it clear that the location is not a punishment, but it is also not a fun place to hang out. It's a place to take a break.

So anyways, in addition to 1-2-3 Magic we also use a resource developed by an autism specialist called the Zones of Regulation which is "geared toward helping students gain skills in consciously regulating their actions, which in turn leads to increased control and problem solving abilities." Again, it is a self-regulation resource that I find useful to use with my entire bunch of firsties. You can read more about it by following the link above, but the big reference poster I made below sums it up pretty simply:
It helps students to begin recognizing what "zone" they are in, in order to regulate their own behaviour. If they are in the yellow or red zone, we have practiced strategies that they can use to help bring them back to the green zone:
The above reference poster is from a great website called Conscious Discipline.

Not only can the kids use any of these 4 calming techniques to control their behaviour, but I am constantly using them casually throughout the day. For example, if the kids are all talking and I need to get their attention I might begin modelling "balloon breath" and the kids know to drop what they are doing and follow along. It works quite well because they enjoy doing the exercises. They're also awesome because they are full-body exercises which requires kids to drop everything and demonstrate full-body listening.

You can download FREE posters of the strategies in various sizes by clicking HERE.

I could probably go on forever about what I've mentioned briefly this post but it about sums up the gist of our classroom behaviour plan. And I have to say that it is by far the most convenient and effective behaviour plan I've tried to date.

Stay tuned because I plan on posting a couple more behaviour/classroom management techniques and resources (and FREEBIES!) that I like using with my firsties.....like this one from my Lessons for the Soul self regulation & SEL primary unit!!!👇

Get your FREE Color Monster lesson and activities!

    I respect your privacy. Unsubscribe anytime. No worries!

    But as always, I love hearing from you. 
    What behaviour plans or strategies have you tried and loved?

    Saturday, October 26, 2013

    Pumpkins, Seasons, & Dry Erase Practice Binders

    Get ready for an all-over-the-place blog post!

    First up: our adorable pigeon pumpkin!
    Have I ever mentioned that I. LOVE. PIGEONS?! Seriously love them. Need to own one.
    ANYWAYS, I'm sure you recognize that this particular pigeon is from one of our (my) very favourite children's books series by Mo Willems:
      
    HA! Just looking at all the covers makes me laugh :)
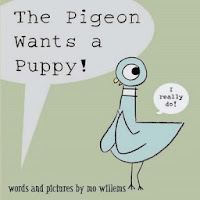
    P.S. Did you know about "The Pigeon Wants a Puppy!" and "The Pigeon Needs a Bath!"??? ...I'm going to need to get my hands on those ASAP! 
    (We're telling the pigeon: "DON'T DRIVE THE BUS!" hehe)

    Next up: a new science unit all about Daily and Seasonal Changes.
    To kick off our new unit, we split into 4 groups--one group for each of the 4 seasons. The kids worked together to brainstorm every single little thing they could think of associated with that season. I am always blown away by all the things they come up with...more than I ever would have thought of! 
    (we also found ourselves referencing books from our classroom library to help fuel our thinking...what a great opportunity to introduce basic research skills! The kids went nuts when they discovered that they were doing research: I overheard one little guy say, "Wait guys, we need to do some more research!" haha too stinkin' cute.)
    After creating our brainstorms, we presented them to the class. Next week, we will take ideas from all 4 brainstorms and compile them into one big anchor chart.

    In writing, we began our making connections focus with one of my favourite fall books, Spookley the Square Pumpkin:
    We first wrote a diagnostic piece (I simply read the story and asked the kids what it might have reminded them of--no prompts, no sharing, cold-turkey writing!). 
    (click the pic on the right to download your FREE copy!)

    The next day we discussed our connections, made a making connections success criteria checklist, I modelled a level 4 connection, and we wrote our same {or new} connections once again.

    Let's be friends!

    Get teaching tips, ideas, and FREEBIES every now and then.

    Last but not least, I'm dying to share our new dry erase binders with you!!!
    I spent all last week working on it and launched it in my classroom with a few of my kiddies this week. 
    My favourite thing about it?
    Read.  Write.  Wipe.
    I find erasing dry erase markers from page protectors is way cleaner than on a whiteboard!
    *2016: THIS PRODUCT HAS SINCE BEEN UPDATED*
    (the photos featured in this post do not reflect the updates)
    I originally began creating these worksheets as alternative to center activities for a couple of my emergent level learners. But the unexpected surprise was that all of my kids fell in love with the activities! 
    Seriously. What is the deal with first graders and dry erase markers?! 
    I ended up printing out 3 extra copies of each worksheet and making a total of 5 binders so that there are 3 "community" binders for the whole class to use. I will make them available as a Fast-Finishers activity. SUPER for a little extra practice!
    Here's a close up of what I included in my binders:
    And the BEST thing about this is...NO LAMINATING OR CUTTING! woohoo! (If you're a teacher, I know you share my excitement!) All you do is print each page and place the pages you want to include in your binder in basic plastic page protectors. Stick everything in a binder, grab a whiteboard marker, and you're ready to go!
    If you are interested in using this binder in your classroom or even at home with your own little learner, click the pic:

    Have a fabulous weekend :)
    Related Posts Plugin for WordPress, Blogger...