Sunday, November 10, 2013

Math Tubs!

Hi everyone! I *finally* found the time to write a quick post! These ecards always seem to sum up my life perfectly:

Anyways, since I began this blog I have yet to write about how I run my math tubs...so let's get started!
I use a system similar to my literacy centres.
(click the pic below to link to my original post and download your FREE editable SmartBoard file!)

How it all works:
I use math tubs primarily as extra practice. It works particularly well for fast finishers and differentiation; after our daily math lesson (including whole group, small group, and independent work periods), I put up the SmartBoard file and students move to their assigned math tub activity as they finish their day's work. That way, whether students work fast, slow, need extra 1:1 assistance, etc., everyone is learning and DOING math for our entire math block. There is no.wasted.time. 

I run my math tubs so that there are never more than 3 students in one group (ideally, I like to have 2 students per group). I just find this minimizes "social" time and maximizes on-task learning time. Click the pic below to download a FREE editable copy of my math tubs SmartBoard file. 
To keep things interesting, I change the background every once in a while to match the season/holiday. (If you are unsure how to change the background once you've downloaded it, just Google it!)

As I mentioned above, the activities in the tubs are extra practice. There is no skill put into a math tub that students have not yet learned or had the chance to practice. Throughout the school year, as we move through the units and learn more concepts, the variety of activities in the math tubs widens. For example, we started with patterning at the beginning of the school year, so the majority of our math tubs were patterning activities with some basic number sense activities as review from kindergarden (you will see these activities in more detail below). Right now, I have one math tub that will always be a patterning math tub (not always the same activity, but always the same concept), I have a couple number sense tubs from the unit we just finished, and I have just added a time tub since we are currently learning about telling time. 

My 8 math tub bins are from a local dollar store:
(click HERE to download my FREE number labels!)

Here's a closer look at the hands-on activities in each of the math tubs...
(these activities were from the beginning of the school year)


2. Mini Number Formation Mats with assorted beans, peas, and corn (FREE!)

(students reach into a bag, pull out any 4 cards, read the cards, and put them in correct number order on the mat)


6. Number Sort & Match
(students find all the number word cards, numeral cards, and dot cards that represent the same number, and use the manipulatives to count and show that number)


(students match each numeral tree with the correct tally card, number representation picture card, and 10-frame representation)

How do you run your math tubs/centres/stations?!

Let's be friends!

Get teaching tips, ideas, and FREEBIES every now and then.

Friday, November 01, 2013

The Day After Halloween...

Seriously. The day after Halloween should be a PD day. 
I.Am.EXHAUSTED. 
But, on the other hand...the wine is uncorked and all is well again in the world :)

ANYWAYS! Despite the insanity, the kiddies had an exciting week. Here's a peek at some of our festive activities:

All week we hunted for sight words in our Halloween poem:

Throughout the week, we did a mini pumpkin investigation:

After estimating how many seeds might be in our pumpkin, we split into groups and counting seeds by 10s:
We brainstormed, predicted, estimated, counted, and, in order to complete the last box ("How should we carve it?"), I had to carve that darn pumpkin.

I am, without a doubt, the world's *worst* pumpkin carver. I paint pumpkins, decorate pumpkins...but when it comes to carving, this is what happens:
The picture even makes it look better than it is. I couldn't have spent more than 3 minutes on it before the kids explicitly questioned why I was "sweating and turning red." Not my cup of tea. 

Anyways, after I finished carving that beast, we filled out the rest of our anchor chart:
and completed our own miniature copies of the investigation:
I LOVED Cara's little scrapbook paper pumpkins and just had to recreate them with my kiddies. How cute is this?!
Grab your FREE copy of the worksheet by clicking the pic below!
During math, we reviewed comparing numbers to 5 and 10 with candy corn:
Click the pic below if you'd like a FREE copy!

Last but not least, I sent my sugar bugs home with ghost poop!
Click HERE to download a FREE editable copy of the gift tags!

...In case I fooled you, it's not really poop from a ghost, it's just marshmallows ;)

And that about wraps up our crazy week. I am going to slowly drift into a candy coma...

Saturday, October 26, 2013

Pumpkins, Seasons, & Dry Erase Practice Binders

Get ready for an all-over-the-place blog post!

First up: our adorable pigeon pumpkin!
Have I ever mentioned that I. LOVE. PIGEONS?! Seriously love them. Need to own one.
ANYWAYS, I'm sure you recognize that this particular pigeon is from one of our (my) very favourite children's books series by Mo Willems:
  
HA! Just looking at all the covers makes me laugh :)
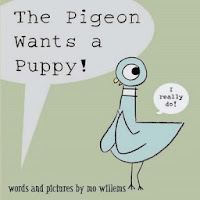
P.S. Did you know about "The Pigeon Wants a Puppy!" and "The Pigeon Needs a Bath!"??? ...I'm going to need to get my hands on those ASAP! 
(We're telling the pigeon: "DON'T DRIVE THE BUS!" hehe)

Next up: a new science unit all about Daily and Seasonal Changes.
To kick off our new unit, we split into 4 groups--one group for each of the 4 seasons. The kids worked together to brainstorm every single little thing they could think of associated with that season. I am always blown away by all the things they come up with...more than I ever would have thought of! 
(we also found ourselves referencing books from our classroom library to help fuel our thinking...what a great opportunity to introduce basic research skills! The kids went nuts when they discovered that they were doing research: I overheard one little guy say, "Wait guys, we need to do some more research!" haha too stinkin' cute.)
After creating our brainstorms, we presented them to the class. Next week, we will take ideas from all 4 brainstorms and compile them into one big anchor chart.

In writing, we began our making connections focus with one of my favourite fall books, Spookley the Square Pumpkin:
We first wrote a diagnostic piece (I simply read the story and asked the kids what it might have reminded them of--no prompts, no sharing, cold-turkey writing!). 
(click the pic on the right to download your FREE copy!)

The next day we discussed our connections, made a making connections success criteria checklist, I modelled a level 4 connection, and we wrote our same {or new} connections once again.

Let's be friends!

Get teaching tips, ideas, and FREEBIES every now and then.

Last but not least, I'm dying to share our new dry erase binders with you!!!
I spent all last week working on it and launched it in my classroom with a few of my kiddies this week. 
My favourite thing about it?
Read.  Write.  Wipe.
I find erasing dry erase markers from page protectors is way cleaner than on a whiteboard!
*2016: THIS PRODUCT HAS SINCE BEEN UPDATED*
(the photos featured in this post do not reflect the updates)
I originally began creating these worksheets as alternative to center activities for a couple of my emergent level learners. But the unexpected surprise was that all of my kids fell in love with the activities! 
Seriously. What is the deal with first graders and dry erase markers?! 
I ended up printing out 3 extra copies of each worksheet and making a total of 5 binders so that there are 3 "community" binders for the whole class to use. I will make them available as a Fast-Finishers activity. SUPER for a little extra practice!
Here's a close up of what I included in my binders:
And the BEST thing about this is...NO LAMINATING OR CUTTING! woohoo! (If you're a teacher, I know you share my excitement!) All you do is print each page and place the pages you want to include in your binder in basic plastic page protectors. Stick everything in a binder, grab a whiteboard marker, and you're ready to go!
If you are interested in using this binder in your classroom or even at home with your own little learner, click the pic:

Have a fabulous weekend :)
Related Posts Plugin for WordPress, Blogger...