Friday, May 17, 2013

Peace Out, Poultry!

In case you're not already crossing off the days yourself, there are 22 more days of school. 22!!! And many of those days are write-offs because of all the end-of-the-year shenanigans that have already begun taking place! BUT...22 more days of school also means that report cards are due in 2 weeks. Oh, boy. Let's let this one speak for itself...
hahah I joke... :)

This week in Word Work the kids used this great (FREE!) resource from A Cupcake for the Teacher:
(click the pic to snag a copy for yourself...thanks Teri!)
Similar to my Rainbow Tracing activity a few weeks ago, I had my kiddies pick any word around the room, roll a die, and write the word in the colour indicated on the Rainbow Roll-n-Write poster. This simple review activity was a hit!

To finish off our mini chicken unit, I had my kids share their knowledge of a chicks life cycle in the form of a little storybook.
They could chose to write about the life cycle of a chicken using fiction or nonfiction (e.g. Fiction: First, a hen lays an egg. Nonfiction: First, Sally the hen laid an egg. She was so exited to be a new mommy hen soon!)
This particular child chose to write a fictitious tale. Too cute!!
(I forgot to take a picture, but one of my students actually wrote "Next, the hen pooped out an egg." hahah ...I silently pray it was a spelling mistake)
This "Tale of Chicken ____" booklet can be found in my Holy Hens! pack.
*2016: THIS PACK HAS SINCE BEEN UPDATED* 
(photos in this post do not reflect the updated product)

For our art centre this week, we made Patchwork Pets. I just googled templates for various animals such as a cat, dinosaur, and turtle, and printed out a bunch of copies. The kids chose their "pet" and drew random lines through the animal to chunk it up. Then, we just coloured various patters/pictures/designs in each section. The result is pretty neat:

In math, we're just finishing up Number Patterns. Throughout the unit, I had the following activities ready as "I'm done, now what?" activities.
First is a 100 chart puzzle. I just made and printed off copies of a basic 100 chart. Then, I cut each one up in a different way to make puzzle pieces. The kids had to use number recognition to put the puzzles back together:
Super simple! The second one is the same idea. The kids got to make their own puzzles using a 50 chart. After making their pieces, they could put their own puzzle together or swap with a friend:

Finally, this week was a sad day. Our time with the chicks was up :( We had such a blast learning about chickens and getting first-hand experiences with these little fluffballs:
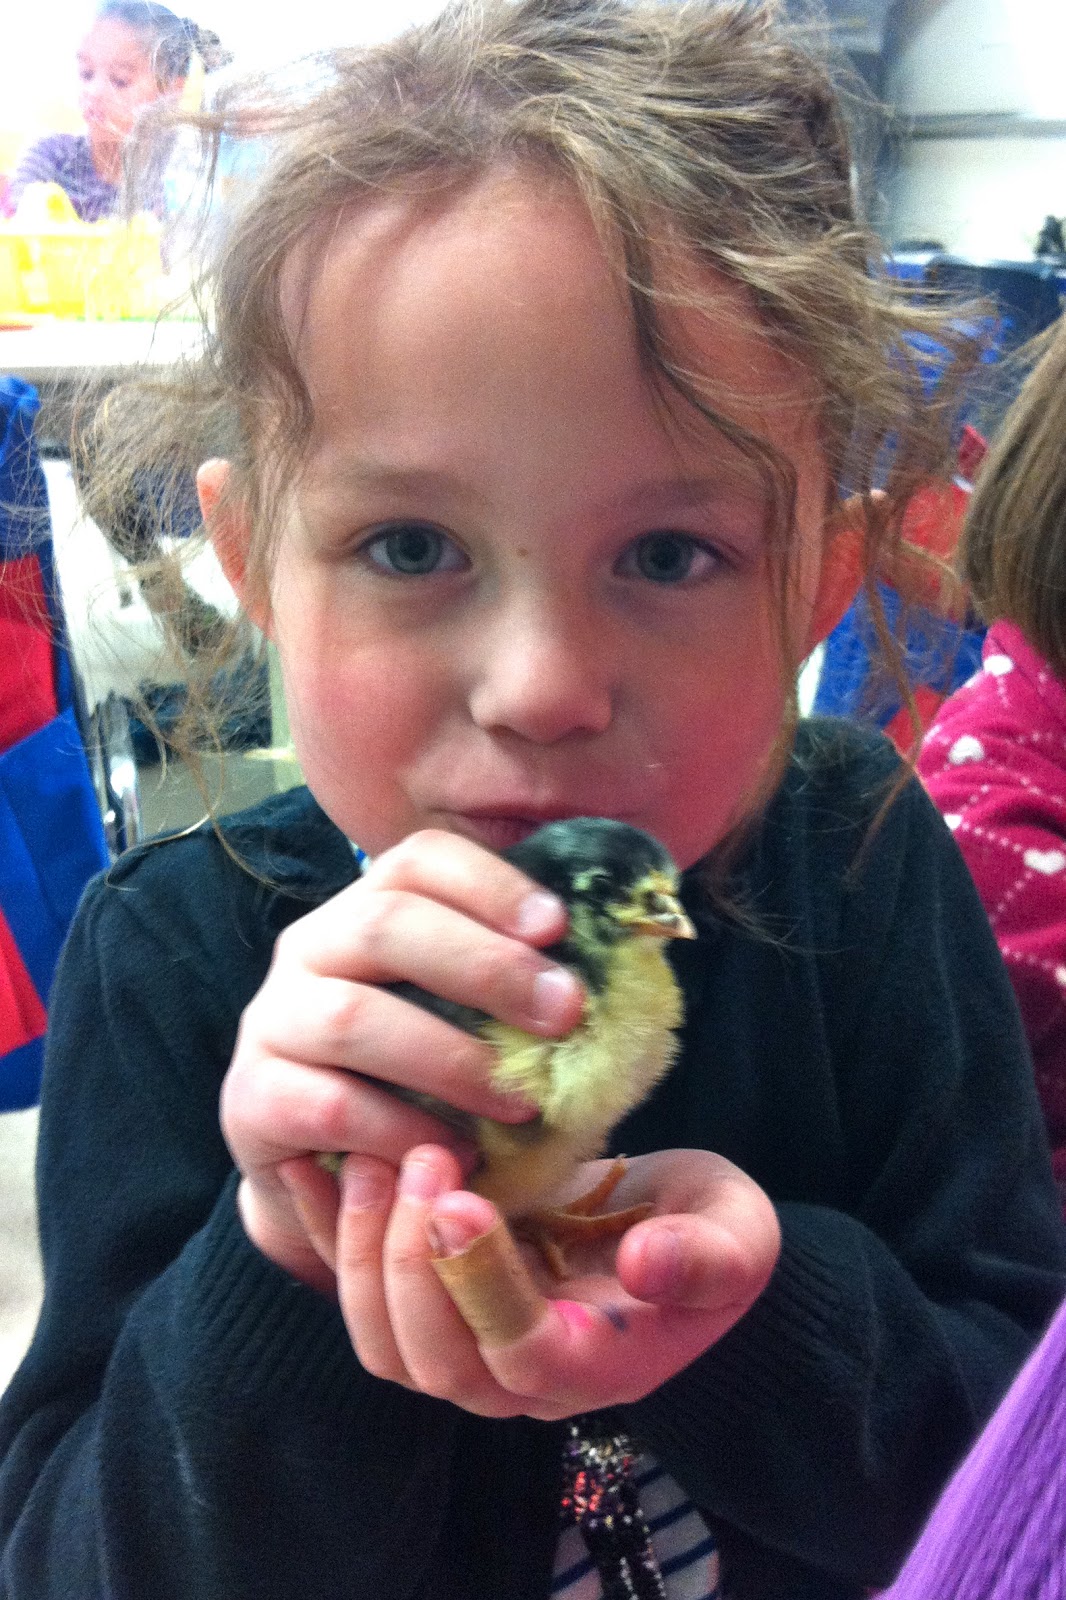
Funny story: we had a fire drill the week before and some of our grade ones were in tears and shouting "The chicks!!! The chicks are going to burn!" haha Thankfully it was just a drill and the chicks are now safe and sound on a beautiful, lush, green farm in the country (at least that's what I told the kids)

Happy Long Weekend, everyone!!!

Friday, May 10, 2013

Two-for-One Post (P.S. They've Hatched!)

Oops! I totally forgot to post last week, so today you get two posts in one! 
But FIRST, our chicks have hatched!!! Lord knows how we got any work done this week...the kiddies were all kinds of excited. I don't blame them, look how fluffy...
These are the ones that have hatched and dried. They are now in a plexiglass box with a warming lamp.
These little ones just hatched last night and are still in the incubator. Once they dry, they will join their fluffy buddies.
I just HAD to hold the tiniest little one. It was so hard not to sneak little Paulo Poultry into my pocket and take him home #Ilovehim

Here's a video of the clumsy little chicks:
...Another video of the chickies that just hatched:
We get to keep them in the classroom for another week. So the poultry party isn't over just yet! 

Okay, moving on to some activities from LAST week. My Oral Language Centre allowed the students to use the SMARTboard for the first time (as a centre activity). I saved pictures from the story Harry the Dirty Dog, and enlarged them on a SMARTboard file without the words. Unfamiliar with the story, the kids got to tell their own version of the story using information from the pictures. At the end of the week, they watched a video of the adorable Betty White reading the actual story, which I just downloaded from YouTube and saved to the SMARTboard file.
(Click the pic for your FREE copy of my SMARTboard file)

All week, we talked about what we needed to do to get ready for Grade 2. One of those things were to polish up our writing skills. While many areas of our writing have greatly improved throughout the school year, I was finding that many of us were getting "lazy" with our letter formations. So back to basics we went!
Throughout the week, I wrote a sentence--throwing in some incorrect letter formations--in blue marker, and we worked together to rewrite the sentence correctly. I had noticed a few of my students letting their words "float" above the bottom line. So we talked about our letters being anchors. We don't want our letters to float away, we want to "drop an anchor" right to the bottom line for every letter. We practiced our new knowledge at the Writing Centre:
I wrote simple incorrect sentences on sentence strips, laminated both incorrect sentences and blank sentence strips, and the kiddies got to rewrite the incorrect sentences using whiteboard markers (I don't know about your class, but give my kids whiteboard markers and they're as happy as a turkey after Thanksgiving!)
Mrs. Montgomery gave me the idea of rainbow tracing for last week's Word Work Centre. The kiddies could pick any word they wanted from our Word Wall, write it in one of the boxes, and trace over it with rainbow colours. This was a simple way to implement differentiated instruction into our Literacy Centres, because the kids could choose words at their own level:
(The above activity is included in the Word Work pack)

Word Work for THIS week helped us practice stretching our letter sounds. Using Bananagrams, the kiddies spelled out the corresponding word for each picture. I had 6 different pages available which were laminated on a different colour of construction paper. At the end of the week, I added small pieces of construction paper (one colour for each "Making Words" page) with the correct spelling of each word so the kiddies could self-correct their words. 
(Click the pic for your FREE copy of all of my worksheets)

Of course, we can't forget about Mother's Day crafts! I was out of town for a conference for 1.5 days this week--pause for picture...
(Me, Mr. Zebra, and Mme. Childs)
--and I left this adorable card for my kiddies to make for mom:
They all turned out amazingly, but of course I thought about taking a picture of all of their Mother's Day gifts AFTER I had already wrapped them. #teacherfail
We also made little teacup pockets. I found the poem on Pinterest. For the teacup, I just drew a teacup on a folded piece of paper, traced it on the opposite side, cut it out, and glued the edges to make a pocket:
We put one peppermint teabag in the pocket. Simple and smells delicious!

Last but not least, a shout-out to the best mom I know...MINE!!!
Left to right TOP: dad, mom, me, Scott (fiance) 
BOTTOM: Marley, Steph (sister), Mark (soon-to-be-brother-in-law)

Thanks for being my biggest supporter even when I drive you nuts :)
I love you!!! 

Happy Mother's Day to all, enjoy your weekend!
Related Posts Plugin for WordPress, Blogger...